grillbots

Track order

FAQs

Orders

Using a promo or discount code is easy! Follow these steps:

  1. Add items to your cart that you wish to purchase.
  2. Go to the checkout page.
  3. Look for a box labeled "Promo Code," "Discount Code," or something similar.
  4. Enter your code in the provided box.
  5. Click "Apply" or "Submit" to see the discount reflected in your order total.
  6. If the code is valid, you will see the discount applied to your order.

Having Trouble Entering Your Promo Code?

If you’re experiencing issues, try these steps:

  1. Clear Your Browser’s Cache: Stored data might interfere with the website's performance. Try clearing the cache on your web browser to refresh your experience.
  2. Switch to a Desktop Browser: If you're using a mobile device, switching to a desktop browser can sometimes help, as they tend to handle website scripts more reliably.
  3. Use Incognito Mode: Open a private browsing or incognito window. Copy and paste the promo link directly into the incognito browser to avoid session or cache-related issues.

Need Help?
If you're still having trouble applying your code or need further assistance, feel free to reach out! We're here to help you.

Need to make changes to your Grillbot order? Here's how and when you can update your order details:

Order Change Policy

We can only change orders that have not yet been processed for shipping. Once an order has been processed or shipped, we are unable to make modifications. However, you may still return your order for a refund once it arrives.

How to Request an Order Change

  1. Contact Support:

    • To request changes to your order, please reach out to our support team through our website chat or by visiting the Contact Us page.
  2. Provide Order Details:

    • Include your order number and specify the changes you would like to make. This will allow our team to assist you efficiently.

Additional Information

  • If your order hasn't shipped yet:
    • If your order was placed within the last two hours, we’ll do our best to make the necessary changes. Beyond two hours, it may be harder to adjust the order, but feel free to contact us to see what can be done.
  • If the order has already shipped:
    • Unfortunately, no changes can be made, but you can return the package once it is delivered.
  • No confirmation email yet?
    • If you haven't received an order confirmation email, it’s possible that your order is still processing. We will escalate your request to the relevant team for further action.

Need Help?
If you have any questions or need assistance with changing your order, feel free to reach out to our customer support team. We're here to help!

If you need to cancel or make changes to your order, we’re here to help! Here's what to do, depending on the status of your order:

1. If Your Order Has Not Shipped

  • If your order was placed within the last 24 hours, we’ll do our best to cancel or edit it before it ships. Please contact us as soon as possible, and we’ll pass your request to the relevant team.
  • If more than 24 hours have passed since your order was placed, we may not be able to stop the shipment. However, feel free to reach out, and we will do everything we can to assist.

2. If Your Order Has Already Shipped

  • Unfortunately, once an order has shipped, we can no longer make changes to it. However, you have the option to refuse the package upon delivery. Once the package is returned to us and the tracking confirms its return, we can process a refund or assist you with placing a new order.
  • If you've already received the package, you can still return it for a refund by following our return process.

3. If You Haven’t Received a Confirmation Email

  • If you haven't yet received an order confirmation email, it’s possible that the order hasn’t fully processed yet. We will escalate your request to our support team to check the status and attempt to make the necessary changes.

4. If Your Order is Already Cancelled

  • If your order is already cancelled, we’ll confirm that for you and ensure that no further action is required.

Need More Help? If you have any questions or need further assistance, don’t hesitate to reach out! We're here to help.

We offer a variety of payment methods to make your purchase as convenient as possible. Here are the payment options you can use on our website.

Accepted Payment Methods:

  1. Debit and Credit Cards:

    • Visa
    • MasterCard
    • American Express
    • Discover
  2. Net Banking:

    • Available for select banks
  3. UPI:

    • Unified Payments Interface
  4. Digital Wallets:

    • PayPal
    • Amazon Pay
    • Apple Pay
    • Google Pay
    • Paytm
    • Other supported wallets

How to Choose a Payment Method: You can select your preferred payment method during the checkout process. Simply follow the prompts to complete your purchase using the method that works best for you.

Need Help? If you have any questions or need assistance with payment methods, please feel free to contact our customer support team. We're here to help!

If you need to update the billing information on an existing order, please follow these steps:

  1. Contact Our Support Team:

    • Reach out to us with the updated billing name, address, and order number to make the necessary changes.
  2. Order Issues:

    • If your order requires a cancellation or has incorrect delivery details, contact us as soon as possible with the order details so we can address the situation promptly.

Need Help?
If you have any questions or need further assistance with updating your billing information, please feel free to contact our customer support team. We're here to help!

How Do I Check the Status of My Grillbot Order?

To check the status of your Grillbot order, follow these steps:

  1. Check Your Email for Tracking Information:

    • After placing your order, you will receive an email with tracking details. Use this information to monitor the shipment.
    • Can't locate the email? Check your SPAM folder.
  2. Tracking Multiple Shipments:

    • If your order was split into separate shipments (for example, the Grill Brush Bundle Set or Grillbot & Case Bundle), you can track each package individually using the respective tracking numbers.

Need Help?
If you have any questions or need assistance with your order, feel free to contact our customer support team. We're here to help!

Shipping

We understand how frustrating it can be when your package is lost or arrives damaged. Here’s what you can do if you find yourself in this situation:

Lost Packages:

  1. Confirm Shipping Address: Double-check the shipping address in your order confirmation email to ensure it's correct.

  2. Check Around Your Home: Sometimes packages are left in unexpected places. Look around your home, including porches, backyards, and other safe locations.

  3. Ask Neighbors/Building Management: Your package may have been collected by a neighbor or building management. Check with them to see if they have it.

  4. Contact Your Local Post Office: Your local post office might have additional information about the package's location. They can help you track it down.

  5. Wait a Few Days: Occasionally, packages marked as delivered might arrive a day or two later.

If Your Package Is Still Missing: If your package is still missing after taking these steps, please contact our customer support team. Provide your order number and any relevant details so we can assist you promptly.

Damaged Packages:

  1. Document the Damage: Take clear photos of the damaged package and its contents. This will help us assess the situation and expedite the resolution process.

  2. Keep All Packaging: Retain all original packaging, including boxes and packing materials. This may be required for the claims process.

  3. Contact Customer Support: Reach out to our customer support team with your order number, photos of the damage, and a description of the issue. We will guide you through the next steps to resolve the problem.

Resolution Process: For lost or damaged packages, we will work with you to find the best solution, whether that involves a replacement, a refund, or other appropriate measures.

Contact Us: If you need further assistance, please don’t hesitate to contact our customer support team. We are here to help and ensure you receive your order in perfect condition.

Thank you for your patience and understanding.

Visit our Shipping Policy

We currently ship to the following countries:

  • United States
  • Canada
  • Australia
  • France
  • United Kingdom (UK)
  • Germany

If you are located outside of these countries and wish to place an order, please reach out to our customer support team through the "Contact Us" form for assistance with shipping options.

Need Help?
If you have any questions or need further assistance with international shipping, feel free to contact our customer support team. We're here to help!


If you haven't received an order confirmation or shipping details, here are the steps you can take:

1. Check Your Email for Tracking Information

  • After placing your order, you should receive a confirmation email with tracking details. If you can't find it in your inbox, be sure to check your SPAM or Junk folder.

2. Still Can't Locate the Email?

  • If you’ve checked all folders and still can’t find the email, please contact our customer support team. We’ll verify your order and send you the confirmation and tracking details again.

Need Help?
If you're still having trouble or need further assistance, feel free to contact our customer support team. We're here to help!

If your order was marked as delivered but hasn't arrived yet, here are some steps you can take to locate your package:

1. Check Safe Locations: If no one was home at the time of delivery, the carrier may have left the package in a safe location around your home. Please check around your home, including porches, backyards, and other hidden spots.

2. Check with Neighbors/Building Management: Sometimes, neighbors or building management may have collected the package for you. Please ask around to see if anyone has received it on your behalf.

3. Verify Shipping Address: Double-check the shipping address in your order confirmation email to ensure it's headed to the right location. This is an important first step.

4. Check with Your Local Post Office: Your local post office may have additional information about the package's location. It's worth reaching out to them for assistance.

5. Wait a Few Days: Occasionally, packages are marked as delivered but take an additional day or two to arrive. Please wait a few days to see if it shows up.

Next Steps: If, after taking these steps, your package is still missing, please contact our customer support team. We are here to help and will do our best to resolve the situation for you.

If your package was not located, we encourage you to reach out to us for further assistance. Simply visit our Contact Us page, and our support team will be happy to help.

We’re committed to ensuring your Grillbot operates smoothly and continues to take the hassle out of grill cleaning!

If your order has been marked as Returned to Origin (RTO), it means that the shipment was returned to us due to delivery issues. Here are some common reasons why this might happen and what steps you can take.

Reasons for RTO:

  1. Multiple Delivery Attempts:

    • Delivery was attempted more than once, but the package could not be delivered due to either a wrong address or no one being present at the given address.
  2. Incomplete or Incorrect Address:

    • The address provided was incomplete, incorrect, or the pin code was wrong, making it impossible for the carrier to locate the delivery address.
  3. Refusal to Accept Delivery:

    • You or someone at your delivery address refused to accept the order.

What Happens Next:

  • Customer Support Contact: Our customer support team will try to contact you on your registered phone number to resolve the issue. If there is no response or the number is not reachable, the package will be returned to the origin.

Steps to Take:

  1. Verify Address Details:

    • Ensure that your address details are complete and correct in your order confirmation email. This includes the street address, pin code, and any other relevant information.
  2. Contact Customer Support:

    • If your order has been returned to origin, please contact our customer support team to update your address information and arrange for re-delivery.
  3. Stay Available:

    • Make sure someone is present at the delivery address to accept the order during the expected delivery window.

Need Help? If you have any questions or need assistance with your RTO order, please feel free to contact our customer support team. We're here to help!

Product Registration & Warranty

Our Grillbot comes with a 1-year warranty that covers the following:

What’s Covered:

  • Parts and Manufacturer Defects: The warranty ensures that any defects in parts or manufacturing are repaired or replaced at no cost within the 1-year period.

60-Day Money-Back Guarantee:

  • In addition to the warranty, we offer a 60-day money-back guarantee if you're unsatisfied with your Grillbot.

Extended Warranties:

  • You can purchase an extended 1-year or 3-year warranty, which covers parts and labor for manufacturer defects.

What’s Not Covered:

  • Misuse due to direct contact with fire.
  • Water damage.
  • Damage from falls off the grill due to not closing the lid.
  • Use on any surface other than a barbecue grill.

If any of these exclusions apply, the warranty will not cover repairs or replacements.

Need Help?
If you have any questions or need further details about your warranty coverage, feel free to reach out to our customer support team. We're here to help!


Registering your Grillbot is quick and easy, and it ensures you receive a 1-year warranty. Follow the steps below to complete your registration.

Steps to Register:

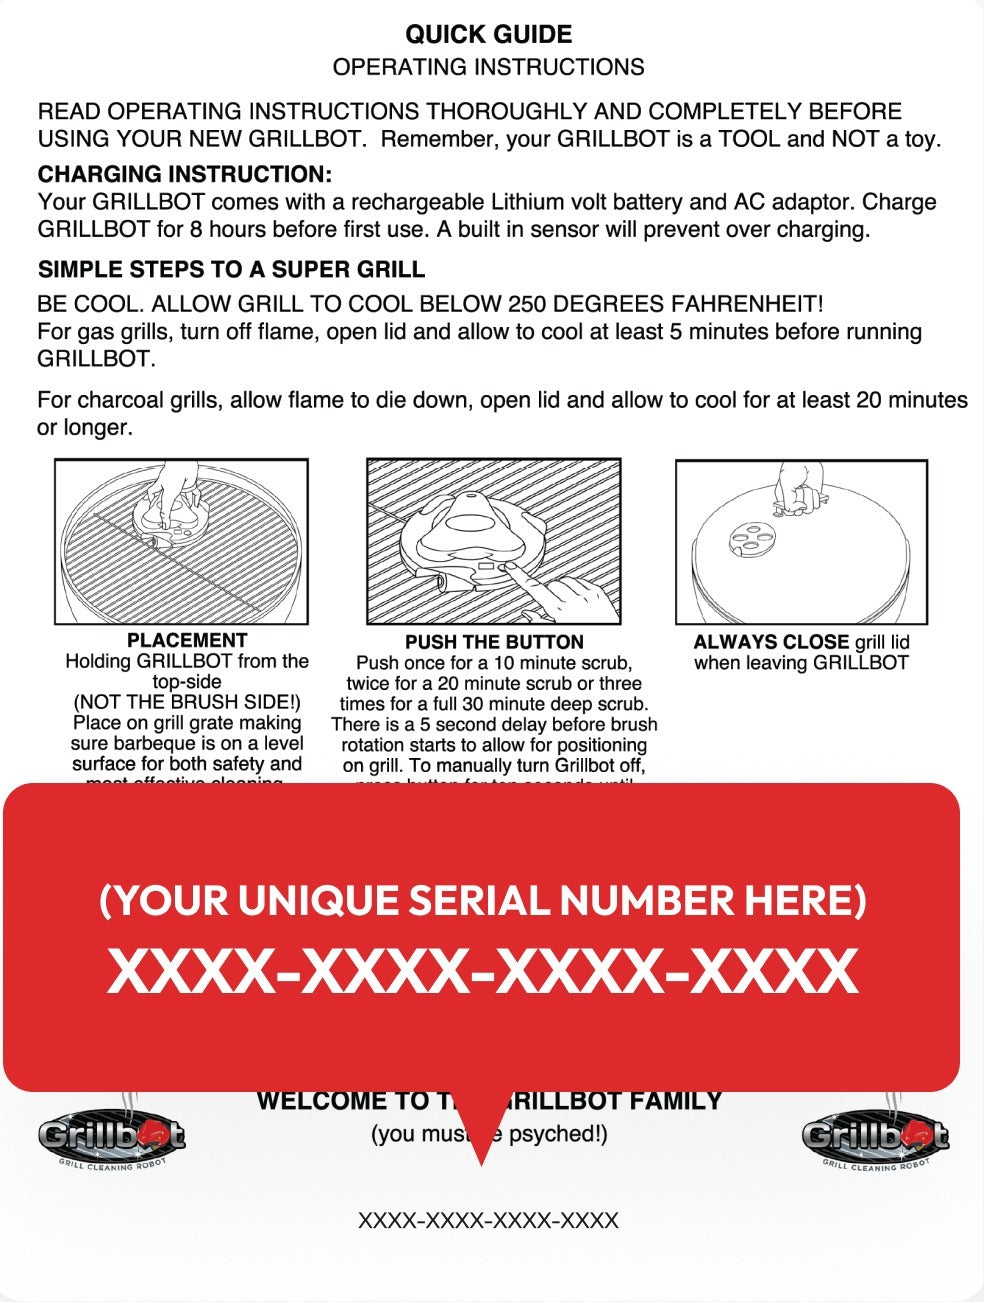
  1. Find Your Unique Registration Number:

    • Your unique registration number can be found on the bottom of the quick reference guide included with your Grillbot.
  2. Visit the Registration Page:

  3. Fill Out the Registration Form:

    • Complete the form with your product serial number and purchase date in the message section.

Need Help? If you have any questions or need assistance with the registration process, please feel free to contact our customer support team. We're here to help!


Returns & Exchanges

Yes, we do accept returns! Please read our full Return Policy

If you'd like to return a Grillbot for a refund, you need to do so within 60 days from the delivery date. 


Click HERE to go to our returns portal.

Please note that we charge a $15 restocking fee. This helps cover the costs associated with processing returns and restocking the item.

All returned merchandise must include all original packaging and accessories. 

When you opt-in for Redo at checkout, your return shipping label is FREE, allowing you to return any item(s) in your order for a refund or store credit without covering the shipping.

*Restocking fees still apply.

Received a Damage or wrong product?

If your machine arrived damaged or you have received the wrong product please contact us at

[email protected]

NOT COVERED:

Misuse due to direct contact with fire, water damage or falls off grill due to not closing the lid, use on any surface other than a barbecue grill.

Grillbot FlipTray Return Policy

  • Returnable within 30 days if unopened and unused
  • Must include original packaging and accessories
  • Used or food-contact FlipTrays are final sale
  • Contact us if you receive a damaged or incorrect item

Grillbot Heat Shields Return Policy

  • Returnable within 30 days if unopened and unused
  • Refunds only issued for confirmed manufacturer defects
  • Contact us with order number + photos if you received a defective item

Grillbot Accessories Return Policy

Accessories - including brushes, batteries, skins, quick-release connectors, and other add-ons are not eligible for return or warranty coverage unless they arrive with a manufacturer defect or returned unused as part of a gift order.

To report a defect:

  • Contact support within 30 days of delivery
  • Provide your order number and photo/video proof
  • If approved, we’ll issue a refund or replacement

Not Covered:

  • Regular wear and tear
  • Accidental damage or misuse
  • Cosmetic blemishes not affecting function


Return Conditions

  • Item must be unused, in original condition, and include all original packaging and accessories.
  • Proof of purchase is required.
  • Refunds are issued to your original payment method after inspection.

Non-Returnable Conditions

  • Opened or used items.
  • Missing parts, packaging, or accessories
  • Fire, water, or fall-related damage.
  • Misuse or improper handling
  • Return attempts outside the return window

How to Return Your Item

  1. Access the Return Portal:

  2. Prepaid Return Label:

    • Once your return is authorized, you will receive a prepaid return shipping label (if you purchased return protection) via email or a scannable QR code. However, please note that a $15 restocking fee applies, and you are responsible for it.
    • Use the provided company-issued return label to ensure efficient tracking and processing.

Return Processing Times

  • Returns are generally processed within 5 business days upon receipt by our returns department.
  • Once your return is processed, please allow an additional 3 business days for the refund to reflect in your account.
  • Refunds are issued back to the original method of payment used for the purchase.

Need Help?
If you have any questions about your return, refund status, or need assistance with the process, feel free to contact our customer support team. We're here to help!


Once your Grillbot return has been processed at our facility, we will initiate a refund to your original form of payment. Please allow some time for the refund to be processed by your bank, as it may take a few business days depending on your financial institution.

Important Information:

  • Refund Processing: Refunds are issued once we have received and inspected the returned product.
  • Returns Portal: All returns can be initiated and processed through our easy-to-use returns portal. Once your return is processed, the refund will be initiated.

Refunds will not be issued for returns that do not meet our criteria. The following types of damage or misuse are not covered:

  • Direct contact with fire.
  • Water damage.
  • Damage from falls off the grill due to not closing the lid.
  • Use on any surface other than a barbecue grill.

If we determine that your Grillbot does not qualify for a return, a refund will not be applied.

Need Help?
If you have any questions or need further assistance with your return or refund, feel free to contact our customer support team. We're here to help!


To file a warranty claim for your Grillbot, follow these simple steps:

  1. Email Us:
    Send an email to [email protected] with the details of your issue.

  2. Include the Following Information:

    • A brief description of what's wrong with your device.
    • Attach images of the problem.
    • Provide your registration number (which you received when registering your Grillbot).

Once we receive your email with all the required information, we will process your claim and assist you in resolving the issue.

Not Covered Under Warranty:

  • Damage caused by direct contact with fire
  • Water damage
  • Falls due to not closing the grill lid
  • Use on surfaces other than a barbecue grill

Need Help?
If you have any questions or need further assistance with filing your warranty claim, please feel free to contact our customer support team. We're here to help!

Grillbots

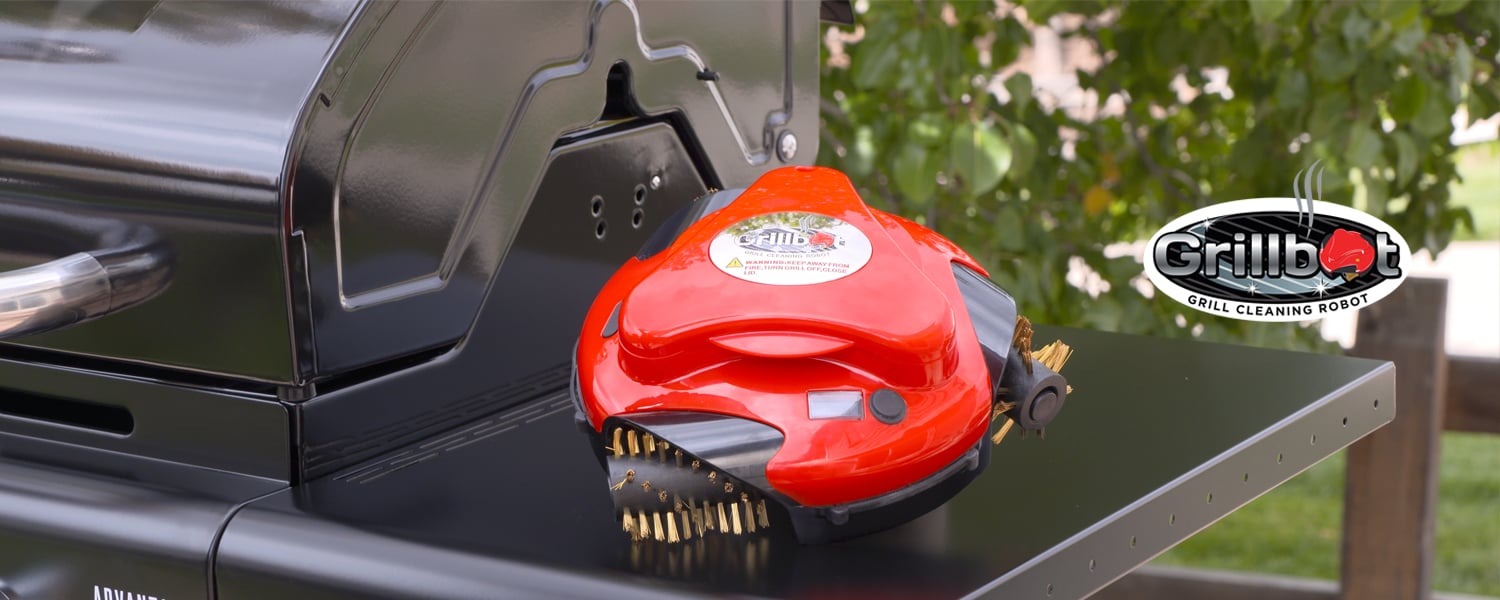
The Grillbot is the world’s first automatic grill cleaning robot, launched on January 13, 2014. It's designed to take the hassle out of grill cleaning, letting you spend more time enjoying your BBQ with friends and family!

How It Works:

  • Easy to Use: Simply place the Grillbot on your grill, press a button, and let it do the work. No more scrubbing!
  • Fully Automated: This fun-to-watch, fully automated device cleans your grill at the push of a button, making it effortless.

Our Mission:

Our goal is to simplify your life by eliminating the grunt work of grill cleaning, giving you more time to focus on what truly matters—your friends, family, and the party!

Features:

  • Automatic Operation: Place it on the grill, press a button, and walk away.
  • No More Scrubbing: The Grillbot does all the cleaning for you.
  • Fun and Convenient: It’s easy to use and surprisingly entertaining to watch in action!

Need Help?
If you have any questions or need assistance, feel free to contact our customer support team. We’re here to help!

A Quick Getting Started Guide to Your Grillbot

Welcome to the Grillbot family! Follow this guide to get the best cleaning results and keep your grill in top shape throughout the grilling season.

Resources

  • Download the quick start guide HERE
  • Download the manual HERE
  • Watch the video tutorial HERE

Tips and Tricks:

  • Deep Cleaning: Press the Grillbot button again for a deeper clean of your grill grates. Regular use will keep your grill well-maintained.
  • Stubborn Stains: Use a degreaser for tough, burnt-on stains like sauces and cheese.
  • Level Surface: Ensure your grill is on a level surface for optimal cleaning results.

Safety Tips for Cleaning BBQ Grill Brushes:

  • Turn Off Grill: Always ensure the grill is turned off, with no flames, and the lid is closed when using the Grillbot.
  • Initial Charge: Charge the Grillbot for about 4 hours before first use. The built-in sensor will prevent overcharging.
  • Flat Surface: Place the Grillbot on a flat, even surface for best performance.
  • Replaceable Brushes: Replacement brushes are available on our website.
  • Dishwasher Safe: Grillbot brushes are easily removed and dishwasher safe.
  • Brush Types:
    • Brass Brushes: Protect the coating on your grill grates while maintaining flavor.
    • Stainless Steel Brushes: Ideal for a more robust clean, recommended for non-coated grill grates.
  • Easy Operation: Press the button once, and Grillbot cleans your grill in minutes. It beeps when done. Turn it off by lifting it off the grill and pressing the button for 3 seconds.
  • Temperature: Grillbot can be used on hot or cold grills up to 200 degrees (no flames!). If it detects flames, the built-in alarm will sound.
  • Close Lid: Always close the lid when not watching the Grillbot.
  • Cleaning: Remove the brushes and wipe the bottom of the Grillbot with a damp cloth or degreaser. The brushes are dishwasher safe.

Enjoy Your Grillbot!

It's time to let your Grillbot do the work! Keep your grill clean and ready for your next barbecue.

Need Help?
If you have any questions or need further assistance, please contact our customer support team. We're here to help!

Thank you for choosing Grillbot!

Grillbot offers different types of brushes to cater to various grill surfaces. Here’s a guide to help you choose the best brush for your specific grill type.

1. Nylon Brushes:

  • Best for: All Grill Types
  • Benefits:
    • Gentle on surfaces
    • Does not scratch
    • Long-lasting (may require longer cleaning cycles)
  • Description: Nylon brushes are perfect for general use and work well on all types of grill grates, helping to maintain the pristine look of your grill.

2. Brass Brushes:

  • Best for: Stainless Steel or Porcelain Grills
  • Benefits:
    • Softer metal
    • Less likely to scratch
    • Does not leave tiny bristles
  • Description: Brass brushes are ideal for stainless steel or porcelain grills. They help keep your grill looking great without causing scratches.

3. Stainless Steel Brushes:

  • Best for: Cast Iron or Expanded Steel Grills
  • Benefits:
    • Tough and industrial-grade
    • Penetrates tiny pores in cast iron
    • Provides a thorough clean
  • Description: Stainless steel brushes are designed for heavy-duty cleaning. They are perfect for cast iron or expanded steel grills, offering a deep clean by getting into the tiny pores of the cast iron.

Summary:

  • Nylon Brushes: Suitable for all grill types, soft yet durable, ensuring a scratch-free cleaning performance.
  • Brass Brushes: Ideal for stainless steel or porcelain grills, softer metal prevents scratching and keeps your grill looking great.
  • Stainless Steel Brushes: Perfect for cast iron or expanded steel grills, provides a deep clean and penetrates tiny pores in the cast iron.

Choosing the right brush ensures optimal cleaning and maintenance of your grill, helping you achieve the best grilling experience.

Need Help? If you have any further questions or need assistance in choosing the right brush, please feel free to contact our customer support team. We're here to help!


The Grillbot’s brushes are dishwasher safe, but the Grillbot unit itself is not. To clean the Grillbot:

  1. Remove the brushes and place them in the dishwasher for easy cleaning.
  2. For the Grillbot unit, simply wipe the bottom with a damp cloth or a degreaser.

Avoid submerging the Grillbot or placing the entire unit in the dishwasher.

Grillbot brushes are designed for easy removal, cleaning, and replacement. Follow these steps to keep your Grillbot in optimal working condition.

Step-by-Step Guide: Watch the Video

1. Removing the Brushes:

  • Step 1: Flip the Grillbot over so that you have clear access to the brushes.
  • Step 2: Locate the quick release adaptors securing the brushes in place.
  • Step 3: Gently pop the brushes off the Grillbot. They should come off easily with a little pressure.

2. Cleaning the Brushes:

  • Step 1: Once the brushes are removed, you can clean them by hand or place them in the dishwasher.
  • Step 2: If cleaning by hand, use warm soapy water to scrub the brushes and remove any stuck-on debris.
  • Step 3: If using a dishwasher, ensure the brushes are placed securely in the dishwasher rack.

Need Help?
If you have any questions or need further assistance, feel free to contact our customer support team. We're here to help!

Removing and cleaning your Grillbot brushes is a simple process. Follow these steps:

How to Remove the Brushes

  1. Flip the Grillbot over to access the brushes.
  2. Locate the quick release adaptors on each brush.
  3. Apply gentle pressure to pop off the brushes from the adaptors.

How to Clean the Brushes

  • Hand Wash: You can clean the brushes by hand with warm water and mild soap.
  • Dishwasher Safe: The brushes are also dishwasher safe for easy cleaning.

Reattaching the Brushes

  1. Align the brush with the quick release adaptor.
  2. Press the brush into place until you hear a click, ensuring it's securely attached.

If you experience any difficulty, refer to our video tutorials HERE for a visual demonstration.

Grillbot brushes are designed for easy removal, cleaning, and replacement. Follow these steps to keep your Grillbot in optimal working condition.

Step-by-Step Guide: Watch the Video

1. Removing the Brushes:

  • Step 1: Flip the Grillbot over so that you have clear access to the brushes.
  • Step 2: Locate the quick release adaptors securing the brushes in place.
  • Step 3: Gently pop the brushes off the Grillbot. They should come off easily with a little pressure.

2. Cleaning the Brushes:

  • Step 1: Once the brushes are removed, you can clean them by hand or place them in the dishwasher.
  • Step 2: If cleaning by hand, use warm soapy water to scrub the brushes and remove any stuck-on debris.
  • Step 3: If using a dishwasher, ensure the brushes are placed securely in the dishwasher rack.

3. Replacing the Brushes:

  • Step 1: If the brushes are worn out or damaged, you can replace them with new ones.
  • Step 2: Align the new brushes with the quick release adaptors.
  • Step 3: Gently press the new brushes into place until they click securely.

Tips for Optimal Performance:

  • Regularly clean your brushes to maintain their effectiveness.
  • Replace brushes as needed to ensure your Grillbot continues to clean efficiently.

Need Help? If you have any questions or need further assistance, please feel free to contact our customer support team. We're here to help!


The Grillbot is specifically designed for use on grills with a lid. Your grill or flat griddle needs to have a lid or tall edges to prevent the Grillbot from falling off during operation. Without a lid or high edges, the Grillbot may not function properly and could fall off the surface.

Need Help?
If you have any questions about using the Grillbot or need further assistance, feel free to contact our customer support team. We're here to help!


If one or more brushes are stuck or won't stay on, it’s likely time to replace the shafts. You can purchase the quick release shaft HERE.

Broken Shaft Replacement with New Quick Release Adaptor

Replacing a shaft is easy! Follow these simple steps:

Step 1: Remove the brush.
Step 2: Remove the "c-clip" from the brush shaft and pull off the broken shaft.
Step 3: Insert the new shaft and secure it with the c-clip.
Step 4: Ensure that the new c-clip is inserted all the way through the pinhole to keep everything in place.

To see the complete guide with images click HERE.

Need Help?
If you have any questions or need further assistance with replacing the shaft, feel free to contact our customer support team. We're here to help!


If you need replacement parts for your Grillbot, follow these steps:

1.  Troubleshoot the Issue

  • Before purchasing parts, troubleshoot the issue to determine exactly what needs to be replaced. If you're unsure, feel free to contact our support team for assistance in diagnosing the problem.

2. Purchase Parts Online

  • You can easily purchase any parts you need directly from our website. We offer a variety of replacement parts such as brushes, motors, and shafts.

2. Received Faulty Parts?

  • If you received your Grillbot with faulty parts, please reach out to us so we can help you process a warranty claim and provide a replacement.

Need Help?
If you have any questions or need assistance with ordering parts or troubleshooting, please reach out to our customer support team. We're here to help!

Troubleshooting

What to Do if Your Grillbot is Not Functioning Properly

If your Grillbot isn't working as expected, don’t worry! Below are some common issues and how to resolve them.

1. One or More Brushes is Not Spinning

If you notice that one or more of your Grillbot's brushes isn't spinning, it's most likely due to a broken motor. In this case, the motor will need to be replaced. For a step-by-step guide, check out our motor replacement tutorial.

2. Brush Won’t Remove for Cleaning

If you're having trouble removing the brush for cleaning, the issue may be with the quick release adaptor. This part may need to be replaced if it's worn out. We have a detailed tutorial on our website that walks you through how to replace the quick release adaptor.

If your issue doesn't fall into one of the categories above, we encourage you to reach out to us for further assistance. Simply visit our Contact Us page, and our support team will be happy to help.

We’re committed to ensuring your Grillbot operates smoothly and continues to take the hassle out of grill cleaning!

If your Grillbot won't turn on, the cause might be a sleeping battery. Sometimes, the battery may need to be reset or replaced. Head over to our website for a guide on how to reset the battery and troubleshoot power issues.

In some cases your battery needs to be rebooted. All our batteries are plug n' play. If the reboot doesn't work, you can order a replacement battery HERE

Need Help?
If you have any questions or need assistance, feel free to contact our customer support team. We’re here to help!

If one or more brushes on your Grillbot have stopped spinning, this is likely due to a broken motor. Fortunately, replacing the motor is quick and easy.

Order a New Motor

You can order a replacement motor HERE. All of our motors are plug-and-play, meaning no complicated wiring is required.

How to Replace a Broken Motor

Follow these simple steps to replace your motor:

  1. Remove the brush and quick release adaptor first.
  2. Open the lid using a 3mm Allen wrench.
  3. Remove the two screws to take out the old motor.
  4. Insert the new motor and gently plug it into the PCB board. It will only fit one way, so DO NOT FORCE it.

For detailed, step-by-step instructions, read our easy-to-follow guide HERE.

Following these steps should have your Grillbot up and running again in no time!

Need More Help? If you have any questions or need further assistance, don’t hesitate to reach out! We're here to help.


FlipTray

Fliptray keeps raw and cooked foods 100% separated so you grill safely with confidence.
Each side is clearly labeled “RAW” and “COOKED”, giving you peace of mind and eliminating the guesswork that often leads to cross-contamination.
No more wondering which tray touched raw chicken, Flip, prep, and serve without mixing juices.

No more scrambling mid-burger flip.
Fliptray stores 4 stainless steel tools conveniently inside the handles:

  • Spatula
  • Fork
  • Tongs
  • Basting Brush

Your essentials are always right where you need them.

Yes! Fliptray is a full-service grilling system in one simple design.
Prep your food on the RAW side cutting board, use the built-in stainless tools while grilling, then flip to the COOKED cutting board side to serve.
You’ll save time, reduce dishes, and enjoy a smoother grilling experience from start to finish.

Fliptray Manual V2.0.pdf18.2MB


1. Prepare ON the Fliptray
Prepare and cut meat, poultry and vegetables etc. directly on the ‘RAW’ side of the Fliptray.

• The tough surface can be used as a cutting board.
• Raw juices conveniently drain into the large well in the base below!

Then simply take the whole tray with its built-in tools straight to the BBQ!

Get cooking!
Take your freshly prepared food from the tray and start cooking on your pre-lit BBQ.


2. Flip the tray!
Lift the front of the (now empty) tray using the Lift & Flip Tab in the centre.

Slide the tray on its rollers in the Base and flip-over, so the ‘COOKED’ side is facing up.


3. Serve it up!
Use the built-in stainless steel BBQ tools to cook up your feast.

Serve cooked food directly onto the ‘COOKED’ side of the Fliptray.

• Gravy & cooked juices are collected and can be poured from spouts in the top tray.
• Carve your steaks and cut your veggies directly on the tray!

And, when you’re done, simply clean the Fliptray, base and tools in the dishwasher!
The base can also be hand washed if too big for your machine!

Simply place the Fliptray™ and utensils in the dishwasher!
The Fliptray™, Base, and BBQ Tools are ALL dishwasher safe.
(Handwash the base, if too large for your machine.)

  • Drain juices from the Base, by opening the silicone drain plug over a sink.

  • Then simply place all the parts in the dishwasher to clean.

  • Placing the Base upside-down will help prevent water resting inside, when drying.


Care & Advice

Your Grillbot Fliptray™ is designed to last many years, following these simple rules:

  • To handwash, use hot soapy water and a non-scratch sponge or brush. Air-dry or dry thoroughly with a soft dry cloth.

  • Do not use harsh chemicals or solvents to clean.

  • Do not place the Fliptray or base directly onto heat or flame – it is designed as a preparation and serving tray, not as a cooking surface.

  • The Fliptray is made of tough, food-safe polypropylene that you can prepare and cut food on. Please note the use of knives will scratch the surface over time.

  • Do not use excessive force when using blades, doing so may cause deep scratches. Do not use heavy cleavers or high-chopping action.

  • Do not cut or chop on any part of the Base.

  • The Fliptray and Base are pre-assembled, please do not remove fixed parts and screws, as this may damage them.

  • Do not completely remove the silicone drain plug, it is designed to stay attached.

  • Store assembled, in a dry place.

Insert the Fliptray™
Turn the ‘RAW’ or ‘COOKED’ side to face up, as needed.
Simply drop the tray’s roller hinges into the slots either side of the base.


Close the Quick-Release Drain
Simply twist and push the silicone drain plug into the hole in the base.

To open the drain
Pull and twist the drain plug gently from the drain hole when you want to release juices or grease from preparation.

The plug is designed to stay attached to the base, so it can’t be lost.

Heat Shields

The Heat Shield blocks flare-ups, splatters, and uneven heat so you don’t feel the burn.
 Just slide it onto your spatula, fork, or tongs, and grill confidently. It acts like a protective barrier between your hands and the heat, giving you control without the sizzle.
No more jumping back from sudden flames or rushing through the cook.

Yes - it fits virtually all standard grill utensils.
 Its flexible, BPA-free silicone design easily slides onto your favorite tongs, spatula, or fork without hassle.
No need to buy new tools. Just upgrade the ones you already love.

Insert your BBQ Tool.

  • Place the BBQ tool into the back of the Grillbot™ Heat Shield, facing up (in the way you would usually use that tool).

  • Ensure the design-side of the heat shield is down, so it faces the heat when using the tool.


Secure the Heat Shield Strap.

  • Pull the Heat Guard Strap tightly around the handle of the BBQ tool.

  • Pull the Locking Knob through the nearest hole in the strap.


Use your BBQ Tool!
Simply use your BBQ tool as usual, but enjoy greater safety and more time to cook perfect BBQ food — because the Heat Shield will protect your hand from the heat, flare-ups, and oil splatters!

Simply place the Grillbot™ Heat Shield in the dishwasher!
ALL Grillbot™ Heat Shields are dishwasher safe.

  • There is no need to detach the Heat Shield from your BBQ Tool, unless stubborn dirt has collected between the Heat Shield and handle of your BBQ tool.

  • Simply wash both together in your dishwasher. (You can also wash by hand, if you don’t have a machine.)


Care
Your Grillbot™ Silicone Heat Shield is designed to last many years, following these simple rules:

  • To handwash, use hot soapy water and a non-scratch sponge or brush. Air-dry or dry thoroughly with a soft dry cloth.

  • Do not use harsh chemicals or solvents to clean.

  • Do not place the Heat Shield directly onto heat or flames – it is designed to shield from heat, not to be used directly in flames or directly on top of a heat source.

  • Store in a dry place.


Safety
Always use caution when cooking over naked flames and high heat.

  • Your hand and tool handle must be in the heat shield – with the design-side of the heat shield facing the BBQ.

  • The Heat Shield shields from momentary heat, flare-ups and splatters of oil for a short time in normal use. It will get increasingly hot the longer it is used over heat, potentially causing a risk of burns. Do not keep over heat longer than necessary.

  • The Heat Shield will only shield the hand used to hold the tool it is attached to. It is not designed to protect any other part of your body, or others around you.

  • BBQ tools used with the Heat Shield will still get hot. Exercise caution to avoid burns, do not touch parts of BBQ tools that have been directly exposed to heat.

  • If you suffer a serious burn, please seek immediate medical advice.

  • This product is NOT A TOY, please KEEP AWAY FROM CHILDREN. Ensure children remain supervised when using this product.

  • If this product becomes damaged for any reason and particles of silicone enter food, do not consume.


Smart Apron

Every Smart Apron order includes:

- The machine-washable multi-pocket BBQ apron

- A clip-on neck strap

- The removable Command Center (Bluetooth speaker, LED light bar, range extender)

- The Bluetooth Meat Thermometer

- A USB-C charging cable

It is a tough BBQ apron with tool loops and pockets, plus a high-tech Command Center that adds four things to your grilling: a Bluetooth speaker for music and hands-free calls, a motion-sensing LED light bar so you can see the grill at night, a Bluetooth meat thermometer that tells you on your phone the moment food is cooked, and a USB-C rechargeable battery that powers all of it.

Register at www.grillbots.com/register (use the REGISTER QR code in the manual or Quick Start Guide). Registration is required to receive limited warranty service.

Do I need to charge it before first use?

Yes. Charge the Command Center fully before you use it for the first time. Also remove the shipping tab from the thermometer clip before the first charge.


How do I charge the Command Center?

1. Gently pull the USB-C port cover out of the charging socket (do not remove it completely).

2. Plug one end of the supplied USB-C cable into the socket.

3. Plug the other end into a standard 5V/1A USB charger. Apple-style chargers work fine.

4. The LED indicator glows red while charging and turns off when fully charged.

5. Replace the port cover when done.

**Important: only use a 5V/1A charger. Do not use a fast charger.**


How long does charging take?

About 2 hours for a full charge.


Can I use it while it is charging?

Yes, the device can be used while plugged in.


How long does a charge last?

Up to about 3.5 hours of run time using the speaker and range extender.


How do I charge the meat thermometer?

The thermometer charges from the Command Center. Clip it into its holder on the Command Center and the LED indicator flashes green while it charges, then turns off when full. Keep the thermometer clipped in whenever you are not using it so it stays topped up. Remember to remove the shipping tab on the clip before the first charge.


Can I replace the battery?

No. The Command Center is a sealed unit and the battery is not designed to be changed. With proper care the rechargeable lithium battery has a long life.


What do the LED indicator colors mean?

- Solid red: base charging

- Flashing red: low battery

- Solid blue: Bluetooth connected

- Flashing blue: speaker Bluetooth is on (pairing mode)

- Solid green: extender on

- Flashing green: thermometer charging

How do I attach the Command Center to the apron?

Make sure the built-in stand is folded closed and flush. Slide the bottom and sides of the Command Center into the bracket on the apron's chest dock and push down until it clicks securely into place.


How do I take it off the apron?

Gently pull the Command Center straight up and out of the dock.


Can I use the Command Center off the apron?

Yes. Remove it from the apron, then gently pull the top of the stand down from the rear of the unit. It stops when it is fully open. Do not force it past that point or you can damage the stand. Set it on any flat surface for music, light, and calls while you cook or entertain.

How do I connect the speaker by Bluetooth?

1. Turn Bluetooth on in your phone settings.

2. Long-press the Play button on the Command Center for about 3 seconds. The LED flashes blue and the speaker says "Bluetooth mode".

3. On your phone, pair with the device named **GBA101**.

4. When the blue LED stops flashing, you are connected.

The speaker remembers your phone and reconnects automatically next time. To pair a different phone, make sure other previously paired phones are out of range or unpaired, then repeat the steps.


How do I control music?

- Play or pause: short-press the Play/Pause button

- Next track: short-press the plus (+) button

- Previous track: short-press the minus (-) button

- Volume up: long-press plus (+) for 3 seconds

- Volume down: long-press minus (-) for 3 seconds


How do I take phone calls?

- Answer a call: short-press Play/Pause (music pauses)

- End a call: short-press Play/Pause (music restarts)

- Call volume: same as music volume above

Note: dial from your phone. The speaker does not support voice dialing.


How does the LED light work?

The Command Center has a bright LED light bar for grilling at night.

1. Press the light button once to enable the light function. The light flashes then goes off, which means gesture control is now active.

2. Wave your hand over the sensors (on the right side of the Command Center): the first wave turns it on at brightest, the second wave dims it, the third wave turns it off.

3. Change the angle by pulling the light bar forward to the position you want, or push it back using the tab.

Because it is gesture controlled, sticky or messy hands are not a problem.


Why won't the light turn on?

To save battery, the light does not work in daylight. It also turns itself off automatically after 60 seconds of daylight. This is normal and expected behavior.

How do I use the meat thermometer?

  1. Install the free Grillbot App and connect the thermometer by Bluetooth (see below).
  2. Insert the probe into the food up to the safety notch near the handle.
  3. Open the app and select 'Meat Thermometer'.
  4. The current food temperature shows on screen. Choose a recipe to be alerted when it is cooked the way you like.


How do I connect the thermometer?

  1. Download and install the Grillbot App, then turn on Bluetooth in your phone settings.
  2. Unclip the thermometer from the Command Center. The indicator LED flashes green and it starts searching for a connection.
  3. Immediately open the Grillbot App. The phone and thermometer pair automatically.
  4. A solid blue Bluetooth logo appears at the top of the app screen when connected.

You may also need to allow Bluetooth connection to unknown devices in your phone settings.


What is the safety notch and why does it matter?

The thermometer has a safety notch near the handle. Always insert the probe into food only up to this notch. This protects the probe from the grill's heat and gives correct readings. Inserting it past the notch can damage it.


How hot can the thermometer handle?

  • The probe must not exceed 212°F (100°C) or it will be damaged. Always insert only to the safety notch.
  • The ceramic handle withstands up to 572°F (300°C).


How far can the thermometer reach my phone?

  • With the grill lid open: up to 190 ft (60 m)
  • With the grill lid closed: up to 25 ft (8 m)
  • Extended range: if the thermometer is within 5 ft (1.5 m) of the Command Center, its range to your phone extends up to 390 ft (120 m). The Command Center acts as a range extender.


How do the preset recipes work?

  1. Tap the Recipe button (knife and fork icon) on the app's main screen.
  2. Select the food type (beef, veal, lamb, venison, pork, chicken, duck, fish, hamburger), then choose how you like it cooked (for example, beef rare).
  3. Press START. The app shows the recipe and target temperature, and a red needle marks the target on the dial.
  4. When the food reaches temperature, your phone flashes, sounds, and vibrates to tell you it is ready.

In settings you can switch between °F and °C and choose the alarm type (flicker, sound, vibrate, or a combination). Press STOP any time to end a preset.


Does the app guarantee my food is safe to eat?

No. Preset temperatures reflect commonly preferred results and are not the same as food-safety temperatures. Using the app and thermometer does not guarantee food is safe to consume or heated to temperatures recommended by the FDA or other food safety agencies. Always follow safe food handling guidance.


Can the thermometer work without the Command Center?

Yes, it works on its own, but its range is shorter. Keeping it near the connected Command Center extends the range as described above.

Can I machine wash the apron?

Yes, the apron is machine washable. Always remove the Command Center before washing, and empty all pockets, the holster, and anything attached to the loops.

  • Machine wash the apron only, warm, on a normal cycle, at no more than 140°F (60°C).
  • It can also be hand washed.


Can the Command Center or thermometer go in the wash?

No. The Command Center and meat thermometer must never go in a washing machine, and never submerge the Command Center in water.

  • Clean the Command Center body by wiping with a soft dry cloth. For stubborn stains use a soft cloth slightly dampened with mild soapy water.
  • Be careful around speakers, buttons, sensors, and the charging port. They are sealed, but repeated cleaning with a cloth that is too wet can let water in.
  • Wipe the thermometer with a soft damp cloth. For grease, use a mild food-safe degreaser.


How should I clean the thermometer before cooking?

Sanitize the thermometer with a sanitizing wipe before each use.


What should I avoid when cleaning?

Do not use scourers, abrasives, harsh chemicals, or solvents on any part.


How do I make it last for years?

  1. Follow all use, safety, and care instructions in the manual.
  2. Clean the apron (with the Command Center removed) as often as needed, ideally right after use if heavily soiled.
  3. Clean, recharge, and properly store the Command Center and thermometer after every use.
  4. Keep the Command Center away from high heat and flames.
  5. Never place the Command Center or apron onto grills or over flames.
  6. Always insert the thermometer into food only up to the safety notch.
  7. Store in a cool, dry place. Do not store outdoors or inside the BBQ.
  8. Use only Grillbot-specified parts and accessories.

How do I store it if I won't use it for a while?

If you are storing it for more than 3 months, do not store it with an empty battery. Charge to around 50% before storage and recharge every 3 to 6 months to prevent battery damage and loss of capacity. Store at a temperature between 50 to 80°F (10 to 25°C) in a low-humidity place away from corrosive chemicals or gases.


Why shouldn't I let the battery fully drain?

Letting a lithium battery sit fully depleted can permanently damage it and reduce its capacity. Always charge before long-term storage.


Battery safety basics:

  • The device uses a rechargeable Lithium Ion Polymer battery.
  • Keep batteries away from heat sources. Heat can cause leaking, overheating, smoke, bursting, or fire.
  • Do not open, short circuit, puncture, or tamper with the battery.
  • Never dispose of the device in a fire. The battery may explode or leak.
  • Dispose of batteries safely at a local civic waste collection point. Contact your local municipality or EPA.gov for battery disposal sites near you.

Is the Smart Apron a toy?

No. This product is not a toy. Keep it away from children and supervise children around it at all times.


Important safety reminders:

  • The Smart Apron is not a heat guard or fire-safety device. Keep it away from high heat and open flames.
  • Always use the provided neck strap. Without it, the top of the apron and the Command Center may fall onto the grill.
  • Tie the apron straps to avoid trip hazards, but do not overtighten, to avoid constrictive injury.
  • Take care placing sharp items (knives, carving forks) into pockets, the holster, or loops, as they can pierce the apron or cause injury when retrieved.
  • Do not let any part of the apron fall onto or over a hot grill. If the apron smolders or catches fire, remove it immediately.
  • Never immerse the Command Center in water or other liquids. Remove it before washing the apron.
  • Your grill is hot. Use caution near it and when handling the thermometer in food.
  • The thermometer and its handle get extremely hot during use. Always use a heatproof glove or cloth to handle it when hot.
  • Do not use the thermometer if the handle or probe is split or damaged.
  • The thermometer is only for measuring internal food temperature up to 212°F (100°C). Do not use it at higher internal temperatures or to measure anything other than food.
  • Do not look directly into the Command Center light. It is very bright and may cause eye injury.
  • Only recharge with the provided USB cable and a 5V charger that delivers no more than 1A. Do not substitute power cords or adaptors.
  • If the product becomes damaged for any reason, stop using it.
  • For a serious burn, seek immediate medical advice.

What warranty comes with the Smart Apron?

Every Smart Apron purchased from the Grillbot online store comes with a 60-day money-back satisfaction guarantee and a 1-year limited warranty. 


What does the warranty cover?

The limited warranty covers manufacturing defects in materials and workmanship that occur during normal use of your Smart Apron. This includes defects with the tech module (the Command Center and its electronics): the Bluetooth speaker, LED light, meat thermometer, and charging system, when the fault is due to a genuine manufacturing defect rather than damage or misuse.


What is not covered?

The warranty does not cover:

  • Normal wear and tear
  • Drops or falls 
  • Exposure to fire or excessive heat
  • Weather or water damage from being left outside
  • Damage from improper maintenance
  • Unauthorized repairs
  • Failure to follow the operating instructions
  • Damage caused by accessories or parts not made by Grillbot

The warranty is also void if the product is used outside North America.


Do I have to register to get warranty service?

Yes. Your Smart Apron must be registered to receive limited warranty service. The warranty is not transferable, and once you register, you are the only person who can request service for the length of the warranty. Register HERE.


Where do I have to buy it for the warranty to be valid?

The standard 1-year limited warranty is valid only on products bought through the Grillbot website, Amazon, or authorized sellers. Buying through an unauthorized reseller, or using a product outside North America, automatically voids both the 60-day money-back guarantee and the limited warranty. Proof of purchase is required before warranty service.


Something covered by warranty broke. How do I get it fixed?

Email [email protected] to determine the problem and next steps. Replacement parts and products carry the remaining original warranty, or 60 days, whichever is longer. All replaced parts and products become the property of Grillbot and must be returned to Grillbot. Please register your Smart Apron first.

What is your return window?

You have 60 days. Within 60 days of receipt you can return most items for a refund of the merchandise value. An original receipt or gift receipt is required for all returns and exchanges. 


How are refunds issued?

  • With an original receipt: refunded to the original form of payment.
  • With a gift receipt: refunded as store credit for the amount on the gift receipt.

Returned items must be in new condition and in the original box packaging. Restocking fees apply.


What should I do as soon as my order arrives?

Inspect your purchase right away and notify us of any damage. We will arrange a prompt replacement. The fastest way to reach us is [email protected] or start a return HERE.


Why can't you accept returns on used items?

This is the most common question, so here is the full explanation.

The Smart Apron is a food-preparation product. The meat thermometer goes directly into the food you cook, and the apron and Command Center are handled throughout food prep around a hot, greasy grill. Under our return policy, food-related preparation products are considered final-sale items once they have been used.

There are a few reasons for this, and they are about protecting every customer:

  1. Hygiene and food safety. The thermometer probe is inserted into raw and cooked meat, poultry, and fish. Once an item has touched food, it cannot be returned to a sealed, sanitary, like-new state that we could responsibly resell to the next customer. No amount of surface cleaning lets us certify a used food-contact item as new. Reselling a used food-prep item would put the next buyer's health at risk, so we do not do it.
  2. "New condition" requirement. Our return policy requires items to come back unused, in new condition, and in the original box packaging. A used apron, a thermometer that has been in food, or a Command Center that has been around the grill no longer meets that standard, so it does not qualify for a standard return.
  3. Final-sale category. For these health and hygiene reasons, food-related preparation products are classed as final-sale items. We cannot accept returns on them once used, the same way grocers and other retailers cannot take back opened food-contact goods.
  4. Fairness to every customer. This policy means that when you buy a Smart Apron, you can be confident it is genuinely new and has never been used by someone else. Accepting used returns and reselling them would undermine that promise for everyone.


So if I've used it, am I out of options?

Not at all. Being unable to take a used item back as a "changed my mind" return is separate from your warranty rights. If a used item has a genuine manufacturing defect, especially with the tech module (speaker, light, thermometer, or charging), it is covered by your limited warranty as long as it was registered and bought from an authorized source. In that case, email [email protected] and we will work out a repair or replacement. The used-item rule applies to returns for refund, not to defective products under warranty.


What if my item is unused and I just changed my mind?

If it is still within 60 days, unused, in new condition, and in its original packaging, with a receipt, you can return it under the standard 30-day policy. Restocking fees may apply.


What if it arrived damaged?

Inspect on arrival and contact us immediately at [email protected]. Damage on arrival is handled as a prompt replacement, not a used-item return.


Are there items you can never take back?

Yes. Final-sale items cannot be returned, and we cannot accept returns of food-related preparation products once used, for the hygiene and safety reasons above. We also cannot accept returns on items damaged through normal wear and tear.

Command Center

  • Dimensions: 8 in (20 cm) wide x 2.5 in (6.5 cm) high x 0.75 in (1.9 cm) deep
  • Battery: Lithium Ion Polymer, 3.7V, 700 mAh
  • Charging: USB-C, 5.0V 1000 mA (standard charging), about 2 hours to full
  • Run time: up to about 3.5 hours (speaker and extender)
  • Light: 9 bright LEDs, sensor control, 2 intensity settings
  • Connectivity: Bluetooth for both the base and the thermometer, plus the Grillbot App
  • Functions: Bluetooth speaker, gesture-controlled adjustable light, Bluetooth meat thermometer, range extender for the thermometer
  • Color: Black


Meat Thermometer

  • Battery: Lithium Ion Polymer, charges on the Command Center base
  • Max probe temperature: 212°F (100°C)
  • Handle withstands up to: 572°F (300°C)
  • Range to phone: up to 190 ft (60 m) lid open, 25 ft (8 m) lid closed, up to 390 ft (120 m) with the Command Center as extender


Smart Apron

  • Included: apron, neck strap, Command Center, meat thermometer
  • Features: BBQ apron, chest dock for the Command Center, multiple pockets, tool holster and loop, bottle opener
  • Colors: Black, Red, Blue

Get support

Chat with us